作者:绿林VS逍遥 | 来源:互联网 | 2023-09-01 14:12
篇首语:本文由编程笔记#小编为大家整理,主要介绍了人脸识别----face_recognition安装与应用(附代码)相关的知识,希望对你有一定的参考价值。
篇首语:本文由编程笔记#小编为大家整理,主要介绍了人脸识别----face_recognition安装与应用(附代码)相关的知识,希望对你有一定的参考价值。
face_recognition号称是世界上最简单的基于python的人脸识别库,是在大名鼎鼎的深度学习框架dlib上做的整合,dlib模型在LFW(Labeled Faces in the Wild)能有99.38的准确率。另外face_recognition提供了相应的命令行工具,可以通过命令行来对图片文件夹进行人脸识别,非常的酷,跟随着文章开启步伐前行吧!
一、pip安装dlib库(建议第二种方法)
pip install Cmake
pip install boost
注意:一般还需要下载VS2019(建议不要用更老的版本!)社区版即可。安装好配置完进入下一步。
输入pip install dlib
二、下载whl文件安装
本人用的是python3.8 ,需要该文件请留言或者自行下载,请一定要根据版本下载对应的whl文件。
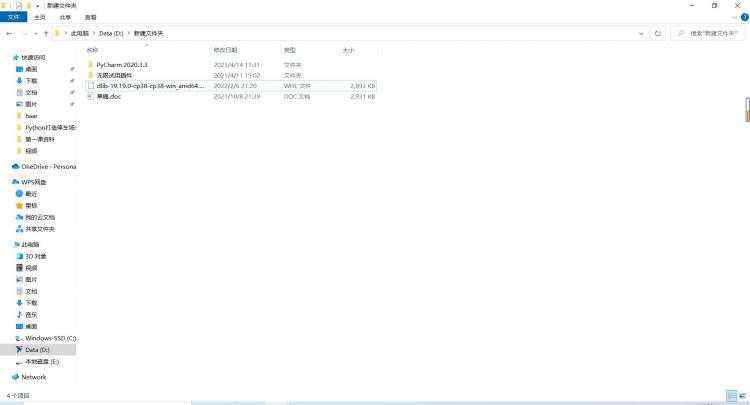
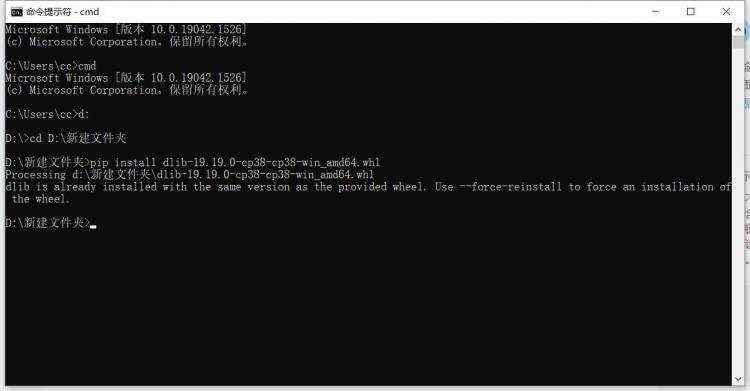
打开cmd,进入存放whl文件目录,如图:


二、安装face_recognition
pip install face_recognition
人脸识别并不需要使用dlib,但是安装face_recognition一定要先存在dlib库
三、使用pycharm进行人脸识别
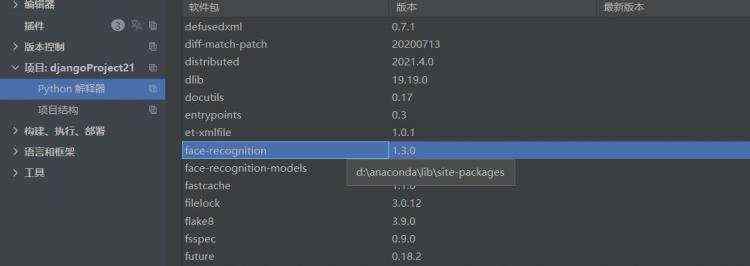
如图,计算器已经存在face_recognition。

views.py代码:
import os
import face_recognition
from django.http import HttpResponse
from numpy import ndarray
import numpy as np
from app.models import csone,ccun
import cv2
def cs(request):#拍照储存生成特征值并存储
    # images = os.listdir('D:/opencv.img')
    # 加载图像
    a = input() #输入的是摄像头拍下图片的命名
    print('ok')
    cap = cv2.VideoCapture(0)  # 打开摄像头,如果外加摄像头便不是0哦
    while (1):
        # get a frame
        ret, frame = cap.read()
        frame = cv2.flip(frame, 1)  # 摄像头是和人对立的,将图像左右调换回来正常显示
        # show a frame
        cv2.imshow("capture", frame)  # 生成摄像头窗口
        b = input()
        print('ok')
        b=int(b)
        if cv2.waitKey(1) & b==1:  # 按下1 类似于摄像头拍照
            cv2.imwrite("D:/opencv.img/" + a +".jpg", frame)  # 并把图片保存到路径的文件夹
            break
    cap.release()
    cv2.destroyAllWindows()
    image_to_be_matched = face_recognition.load_image_file("D:/opencv.img/" + a +".jpg")

    # 将加载图像编码为特征向量,这句是参考别人的代码哦
    image_to_be_matched_encoded = face_recognition.face_encodings(image_to_be_matched)[0]
    alist = ndarray.tolist(image_to_be_matched_encoded)#将矩阵转化为list,便于储存进mysql
    print(alist)
    for i in alist:
        print(i)
        people=ccun()#ccun是自定义的一个models
        people.tezheng=i
        people.name=a
        people.save()
    return HttpResponse("tt")
def opencvcs(request):#人脸识别
    list = []
    students = ccun.objects.filter(name='thth')#筛选出某人的特征值
    for student in students:
        studentlist=[student.tezheng]
        list.extend(studentlist)
    print(list)
    c = np.array(list)#从list变成矩阵
    # 遍历每张图像
    images = os.listdir('D:/opencv.img')
    for image in images:
        # 加载图像
        current_image = face_recognition.load_image_file("D:/opencv.img/" + image)
        # 将加载图像编码为特征向量
        current_image_encoded = face_recognition.face_encodings(current_image)[0]
        # 将你的图像和图像对比,看是否为同一人
        result = face_recognition.compare_faces([c], current_image_encoded, tolerance=0.48)  # 容忍度范围,越大要求越低
        # 检查是否一致
        if result[0] == True:
             piutuce=cv2.imread("D:/opencv.img/" + image)
             res = cv2.resize(piutuce, (126, 126))
             cv2.imshow('yes', res)
             cv2.waitKey(0)
             cv2.destroyAllWindows()#将正确的图像输出
        else:
            print("不同人: " + image)

    #
    return HttpResponse("tt")
models.py代码:
from django.db import models
class ccun(models.Model):
    name = models.CharField(max_length=16)
    tezheng = models.FloatField(default=1)
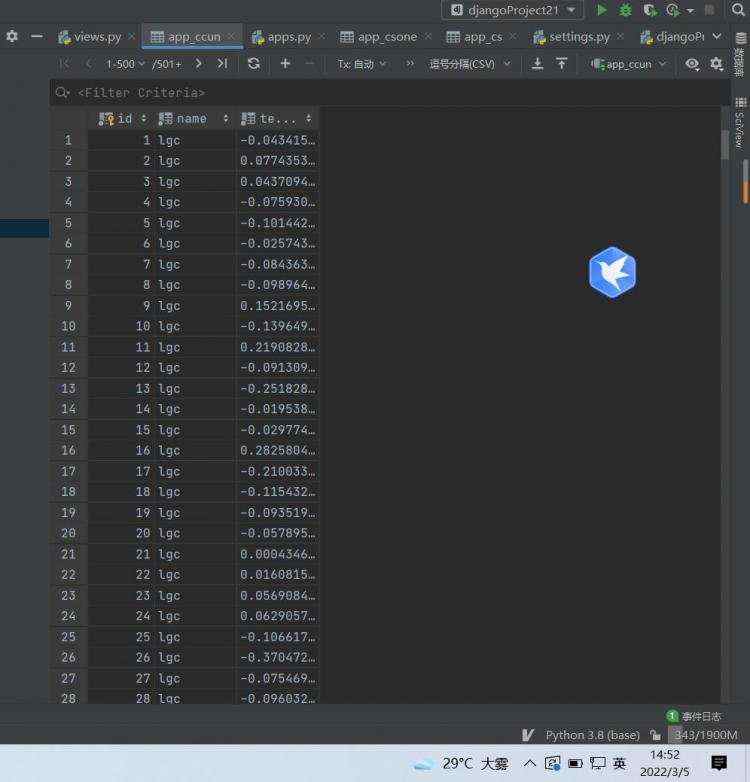
数据库展示
